Car scratch repair: a complete guide
Small car scratches are unsightly while deep scratches can cause more damage if left unattended. Luckily many car scratch repairs can be done at home
No matter how careful you are with your car, it’s almost impossible to avoid picking up a few scratches on the bodywork. In fact, in a very short amount of time any new car can lose its showroom shine, with stone-chips, unforgiving hedgerows and, worst of all, inconsiderate car park users that can leave your pride and joy looking less than pristine.
However, while seeing scratches in the paintwork can be dispiriting, it’s always a good idea to try and rectify the damage as soon as possible. Even the smallest of imperfections can cause problems in the long term, making any repair further down the line more costly and complicated than it could have been.
Regardless of the finish (solid, metallic or pearlescent), all paintwork is made up of multiple layers that combine to create a protective skin over the bare metal underneath. When this is damaged you’re exposing the underlying materials to the elements, potentially leading to issues such as rust. Not only can this be detrimental to the vehicle integrity, it looks unsightly and is likely to affect the value of your car when you come to sell or trade it in.
However, while the idea of repairing these blemishes seems daunting at first, there’s a wide variety of DIY products available that make bringing your car up to scratch (or rather not) more easily and cost effectively than you’d imagine. Moreover, even if you still don’t tackle the job yourself (or the damage is too much for over-the-counter kits), then there are a number of firms offering professional paintwork repairs at a reasonable cost, with many able to do the job at your home or work of maximum convenience.
So, there’s no need to be worried about fixing the odd scratch and keeping your car in tip-top condition. Read on as we reveal all the top tips for pampering your paintwork and sorting out scratches.
DIY car scratch repair: assessing the damage
If damage is more extensive with deep scratches, we’d always recommend seeking the advice of a professional bodyshop, but minor scratches can be tackled at home with products specifically geared towards owners. Take a look at the directions, and only undertake the job yourself if it seems simple and within easy reach of the manufacturer’s claims – otherwise, use an expert.
Minor paintwork damage is so common there’s a whole industry of businesses geared up to carry out repairs – including many who work out of vans and will come to your home or workplace for added convenience. On-the-spot repairs for scrapes and scratches are usually quite affordable, costing around £100 to £200 for minor damage to a single panel, and rarely exceeding £500. Usually, you can also get a free quote before deciding to go ahead, either by sending a picture of the damage or describing it.
Once you know what you’re looking at and understand the basic techniques required to repair the scratches at home, you can then take an informed view as to whether it’s worth having a crack at fixing paint damage by yourself or whether it’s time to call in the pros.
How deep is it?
Even more than its length, it’s the depth of a scratch that determines if a DIY fix is possible. Deeper scratches mean more damage has been done, and the job of correcting it is also more complex. If it runs deeper than just beneath the surface and reaches the undercoat or even bare metal then it may be best left to the professionals.
A car’s factory paint finish is usually made up of three layers. The first layer will consist of a primer and corrosion preventer, and this supports the colour layer, helping it adhere to the car’s metalwork. The top layer is a clear coat, or lacquer, which gives the car its shine and lustre. Each of these layers can be made of several coats, and applying special finishes such as metallic, pearlescent and ‘flip’ colours can be very involving.
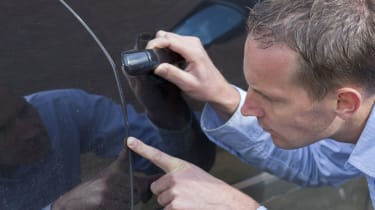
If you gently run your fingernail over a scratch, and its depth feels no greater than the thickness of a piece of paper, it could be that only the clearcoat lacquer is damaged – a relatively straightforward issue to fix.
With deeper scratches (which may feel like a deep cut), the base coat and primer may have been penetrated and there could even be bare metal. In severe cases, damage like this will likely need professional attention.
Repairing a car scratch: what do you need?
Predictably, the deeper the scratch, the more time and equipment you’ll need. Inspect the area around the scratch thoroughly for signs of rust. If you find any, you’ll need to apply a rust converter such as Hammerite Kurust or Jenolite. Follow the instructions carefully and allow it to dry completely (it should turn the rust from a coppery colour to black) before repairing the paint damage.
 Cat S and Cat N cars explained: guide to buying an insurance write-off
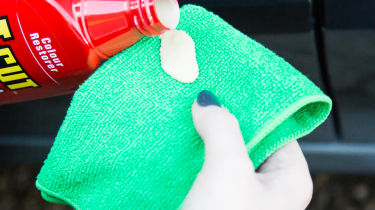
If your scratch is relatively minor, you can use a scratch-removing liquid such as T-Cut, Farecla G3 Professional Scratch Remover or Autoglym Paint Renovator. These abrasive fluids are also known as cutting compounds and remove the top layer of paint to eliminate and ‘polish out’ the scratch.
If the scratch has damaged the base coat, you’ll need to buy some touch-up paint. You can give your car’s registration to your local main dealer who’ll be able to sell you the correct colour. Alternatively, if you can find out the manufacturer’s paint code – usually found on a metal plate mounted on the B-Pillar inside the driver’s door or under the bonnet – you’ll be able to buy the correct colour online or at your local car spares store.
A word of caution, however. Even if you get the correct paint colour, there’s still a possibility it won’t be a perfect match. That’s because there can be slight variations in the precise colour of batches of paint, plus your car’s exposure to the sunlight can gradually dull the paint.
If you use touch-up paint, you’ll usually be able to tell where this has been applied if you look closely, but it’ll obscure the most obvious chips and scrapes from a distance and many people are quite happy with this result.
Keep it clean
However you repair a scratch, it’s important the area you are working on is spotlessly clean, as dust and dirt can be inadvertently rubbed in, damaging the paintwork. It’s also a good idea to work on as small an area as possible, whatever method or kit you’re using.
Using a scratch remover or cutting compound
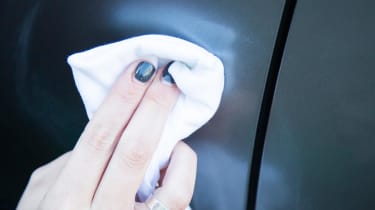
Using a cutting compound is little different to applying a wax. Apply the fluid using a clean, lint-free cloth in gentle circular motions until you can no longer see the scratch. The deeper the scratch, the longer it’ll take.
Once the scratch has gone, you should allow the compound to dry completely to a haze before using a separate lint free cloth to polish it off. The cutting compound will have removed some of the protection afforded by the topcoat, so it’s important to apply a coat of wax at the end of the process.
Remember, the majority of scratch-repair kits work by abrading through the clear coat layer and blending in paint from the base coat to fill in scratches. If you rub too hard or for too long, it’s quite possible to damage your car’s paint permanently, leaving you with a multi-coloured eyesore.
Using car scratch repair kits and pens
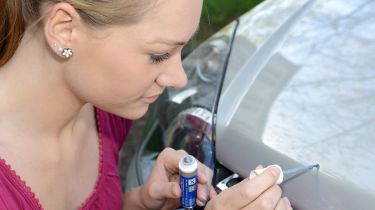
Touch-up pens can be bought for a few pounds, but depending on the product you choose, you may find some more effective than others. Most of them are non-colour specific and use solvents that work in a similar way to cutting compounds. It can be difficult to get consistent results with these.
It’s also possible to buy more comprehensive touch-up kits. These usually comprise a series of very slightly abrasive cloths, and a spray lubricant. Using these together allows you to polish out a scratch and blend it in with the existing paint. Most of these kits also come with a final clear wax or fluid to give added protection to the repaired area.
Whether you’re using a pen or a more comprehensive scratch-repair kit, it’s a good idea to test the product(s) on an inconspicuous area before you start and use masking tape to separate the area you’re working on, ensuring that you don’t go overboard in your application. Make sure you closely follow the instructions that come with any product you’re using and remember: less is usually more when it comes to repairing car scratches.
You should avoid treating scratches in the rain or when it’s particularly windy, hot or cold, as these factors can all compromise the quality of the finish.
Recommended

Classic car tax exemption: which historic vehicles qualify?
Most Popular
Tips & advice

Car dashboard warning lights: what does each symbol mean?

Electric car charging stations: public networks, charger types, apps and maps


