How to use a puncture repair kit
What are puncture repair kits, and how do they work? We reveal all

New cars increasingly come without spare tyres and instead are fitted with puncture repair kits – sometimes referred to as tyre foam.
They’re designed to be easy to use and are quicker than replacing a wheel. Theoretically, less time at the side of the road equals greater safety, but they can be tricky to use and aren't suitable for all types of tyres.
Recognising a flat tyre
Most modern cars come with a tyre pressure warning system. If a warning light or message flashes in your instrument cluster, pull over in a safe place as soon as you possibly can.
If your car doesn’t have tyre pressure monitoring, then the telltale signs are vibrations and judders through the steering wheel. It may be accompanied by unusual droning noises too.
Once you've stopped, locate the puncture, taking care that the tyre isn’t hot – blow outs are often caused by heat building in a flat tyre.
Assuming you have a puncture, rather than a tyre that's losing air very slowly, try and find the cause. If there's a sharp object in the tyre, leave it there - removing a screw or nail can increase the size of the air leak meaning the puncture repair kit may not solve the problem.
If your tyre has disintegrated or has a hole larger than 4mm in diameter, it's time to change the tyre or call a recovery firm, as it's unlikely any amount of tyre foam will fix the problem. If the rim of the wheel is damaged, you should not continuing driving either.
How to use tyre foam
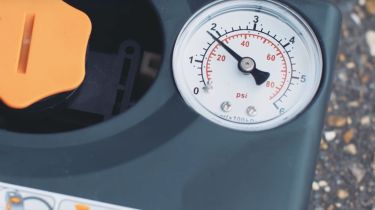
Once you've identified that you have a repairable puncture, retrieve the bottle of sealant and the compressor which comprise the puncture repair kit. These should be under your boot floor; the sealant plugs the hole in the tyre and the compressor re-inflates it.
In your puncture repair kit there should be a sticker to attach to the steering wheel, or anywhere in the driver’s line of sight, as a reminder not to exceed the maximum speed.
Next, remove the dust cap and attach the compressor to the tyre’s valve. Then attach the bottle of sealant to the compressor - it’ll usually screw in - and plug the compressor into the nearest 12v socket.
Switch on the engine and the compressor. Around 10-15 minutes later the tyre should be inflated.
Once you’re done, disconnect the compressor from the tyre valve and replace the dust cap. You’ll need to replace the puncture repair kit, so call your local dealer as soon as you can.
Advantages and disadvantages of tyre foam
Those who have used tyre foam tend to have strong but differing opinions on it.
Many find it easy to use, quick and convenient, meaning you can be on your way in less than half an hour. The extra convenience of not having to lug around a spare wheel is handy; foam is light and compact and means boot space can be increased.
Others say the foam sometime fails to form an airtight bond, meaning calling out a mobile tyre fitter or calling their breakdown company is the only option.
What is certain, is that by using tyre foam, you'll need to replace the tyre as it'll be rendered unrepairable. Depending on the size and location of a puncture, tyres can be 'plugged', a process that costs around £15. A new tyre can easily cost more than £75, plus there's the cost of the replacement tyre foam to consider. Check your breakdown company's fine print too; you may be charged extra for inconvenience if you've not got a replacement tyre - irrespective of whether you've got tyre foam.
For information on the legality and practicalities of tyre tread depth take a look at our article.
Most Popular

New Smart #5 Brabus is a 637bhp far cry from the brand’s city car past

Best car leasing deals 2025: this week’s top PCH offers
Tips & advice

Car dashboard warning lights: what does each symbol mean?

Electric car charging stations: public networks, charger types, apps and maps


