Performing an oil and filter change on your car
Replacing the oil and oil filter in your car is important, but why you should you change engine oil and how can you save money?
There are several areas of important regular maintenance for your car, but ensuring car engine oil is topped up and healthy is one of the most important. The correct oil will increase engine life, boost reliability and ensure the car is safe to drive.
Of all the regular car maintenance jobs that need regular attention, the engine deserves special attention. It is after all what makes your car a car, providing not only propulsion, but also powering all the electrical systems that make it relaxing and safe to travel in. See maintenance as an investment, too, because the engine is the most valuable part of your car and the most expensive to fix if it goes wrong. Engine oil lubricates it, preventing damage and premature wear; even in the short term, a well lubricated engine can save you money by returning better fuel economy.
It can be easy to overlook oil changes, even while keeping your car in good health. This guide explains what engine oil does and why you should get it changed. We’ll also take you through how to change car engine oil yourself.
What does engine oil do?
Of the many jobs car engine oil does, its most important role is lubrication. A car engine contains hundreds of moving metallic parts, which would quickly wear out without oil to lubricate them. Mechanical parts grinding against each other causes friction – something to be limited as much as possible.
Not only will an engine with too much friction be inefficient, it’ll wear out faster, get hot and potentially vibrate and make too much noise. Take away engine oil and an engine would be loud and rough, consume lots of fuel and quickly stop running altogether.
If there’s too much friction between two mechanical components, they can lock together and cause the engine to stop running. This is referred to as seizure and often spells the end for an engine. A seized engine will usually require a complete strip-down for repair and this is often not economically viable.
What does an oil filter do?
As the oil is circulated around the engine, it can sometimes pick up deposits. Sometimes the channels through which oil travels can contain microscopic contaminants, which could be tiny particles of metal from the engine left there from the manufacturing process. Wherever they came from, it’s the job of the oil to clean them out.
As oil picks up these deposits, it becomes dirty, and this is where the oil filter comes in. As the oil is pumped around the engine, it passes through the oil filter, which is designed to remove contaminants in the oil. The oil filter is designed to last for the same amount of time as the oil, so when the oil is due to be changed, an oil filter replacement should be performed, too.
Where is the oil in my engine kept?
Most engines have a trough at the bottom of the engine that oil will pool in. This is referred to as either the ‘sump’ or the ‘oil pan’. Oil sits in the sump when the car is switched off. When you start the car, the oil pump sucks the oil from the sump and distributes it around the engine.
When the engine is switched off, the oil gathers in the sump again, dripping and flowing down from the engine components under the force of gravity. The depth of the oil in a car’s sump can be measured using the ‘dipstick’ – although on some cars it’s also measured electronically by sensors.
Do I need to check my oil level?
It was once the case that you needed to check your oil level before setting off on pretty much every journey. Modern cars can go for months without the engine oil level changing, but it’s still a good idea to check it regularly. You’ll find a description of how to check your oil level later in this article.
Why does my oil level go down?
It’s natural for an engine to ‘consume’ a certain amount of oil as part of its normal running. The amount of oil an engine will consume can vary. The oil level of a healthy engine is likely to drop slightly when brand new – every engine has a ‘running in’ period before it behaves in its normal fashion.
The oil consumption of an engine is likely to increase again as it gets older. As the internal mechanical parts of an engine wear, it may become possible for oil to enter the engine’s combustion chambers and be burnt alongside the petrol.
It’s possible for the engine to burn oil in tiny amounts for a long time without causing significant harm, but as the issue worsens, it can cause damage to the car’s catalytic converter. It can also cause exhaust emissions to reach a level too high to pass the MOT. Blue smoke from the exhaust is the most obvious indication that your car is burning oil.
Oil may also be lost through leaks, so pay special attention to the amount of oil in your engine if you notice unexplained oily droplets, stains or pools beneath your car. An engine oil leak is not necessarily a disaster, but can indicate the existence of a more serious fault.
If you suspect that your engine is consuming too much oil, you should take your car to a garage to be checked by a mechanic.
How do I check my engine oil level?
Most car engines have a dipstick to enable the engine oil level to be checked. Your car’s owner’s manual will confirm if it has one and where it’s located. Otherwise it’ll outline the procedure you should follow if it uses an electronic oil level gauge.
You’ll need a piece of old cloth or some kitchen roll, and it’s a good idea to wear some disposable gloves. It’s also a good idea to wear old clothes and keep long hair and loose jewellery away from engine components.
Your engine should be cold, or at least cool, before you check your oil. This is to ensure you don’t burn yourself on a hot engine and that the oil has been able to trickle back into the sump.
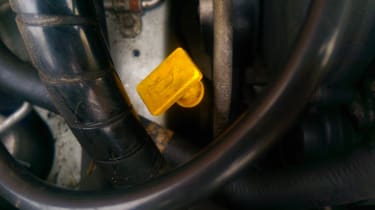
On most modern cars, the engine oil dipstick is mounted near the front of the engine. It may have a bright yellow, orange or red plastic handle, often marked with an icon resembling an oil can (it can look more like a watering can). Once you’ve located it, take a firm hold and carefully withdraw it from the tube it sits in. There’ll be resistance and you may need to pull quite firmly. Make sure you pay attention to where the dipstick came from so you can easily replace it.
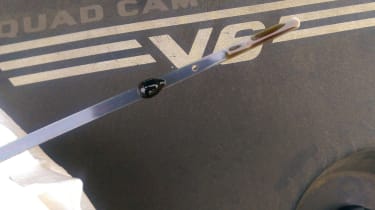
The dipstick will be marked with two indicator lines, which may be labelled MIN and MAX. The ideal is for the oil level to be halfway between these two marks. You’ll likely get a false reading the first time you withdraw the dipstick, so clean the oil off using a piece of scrap cloth. Make sure the dipstick is clean and then replace it in the guide tube, ensuring that you press it fully home.
Wait a few seconds and withdraw the dipstick again. This time the depth of the oil should be clearly visible on the dipstick and will hopefully fall between the MIN and MAX marks. If this is the case, you won’t need to do anything else, other than replace the dipstick and close the bonnet.
If the oil level is at or below the MIN mark, it’ll need topping up. You can find out how to do this in the next section.
How do I change my engine oil and filter
Many modern cars will tell you when your oil needs changing, based on the time and mileage covered since the last oil change.
The cost of an oil change can vary hugely, so it’s worth shopping around.
However, changing a car’s engine oil and filter is a job that can be performed by any competent DIY mechanic without paying garage labour rates. But if you have any doubts at all about performing this operation, we advise you refer your car to a qualified vehicle technician.
To perform an oil and filter change on your car, you’ll need the following:
- The correct quantity oil in the correct grade for your engine (details of this will be found in your owner’s manual)- The correct oil filter and and mounting washer, if applicable. The correct filter can be found using an oil filter cross reference book at a motor factors.- Replacement sump-plug washer if applicable- Oil-filter removal tool- Torque wrench and record of sump-plug torque settings.- Suitable vessel or tray to collect waste oil – note this may need to hold up to 10 litres of oil, depending on the engine size of your carl- You may also need an inspection lamp, which can be positioned in such a way as you can use it hands-free
We recommend wearing overalls or clothes that you’re not concerned about keeping clean, disposable rubber gloves and suitable eye protection when working under the car.
Draining your engine oil
You must have safe and clear access to the underside of your car, using workshop ramps, jack stands or axle supports. Never work under a car that’s only supported on a jack.
The owner’s manual for your car will show points at which it can be supported safely on axle stands. To ensure your safety, we recommend that the raising and safe support of your car be overseen by a competent vehicle technician.
Once you have sufficient space in which to work under your car and it’s securely chocked to prevent movement, you can begin the process of draining the engine. Opening and securing the bonnet is a good idea, as it’ll let light through to help with vision beneath the car.
The sump-plug removal tool will be either a key or socket that can be attached to a wrench. If it’s a key, it’ll engage with a square or hexagonal notch in the sump plug. If it’s a socket, it’ll need to be placed over the plug and pushed fully home.
With an oil-collecting vessel in place below the sump and the tool engaged, the sump plug can be unscrewed from its hole – usually anti-clockwise. This may require some force. You should apply force as smoothly as possible, as sudden shocks risk damaging the sump of the car.
The sump plug may start moving with a sudden jerk, so be careful that the removal tool remains firmly attached to the wrench, as the tool releasing suddenly can cause injury or damage to the car.
As the sump plug unscrews further, engine oil will begin to surge out, so ensure you place the vessel to catch the waste oil, as spillages are difficult to clean up. With the sump plug fully removed, it’ll take a few minutes for the oil flow to reduce to a drip. Once this happens, you can start to remove the oil filter.
The oil filter is a cylinder a little larger than a tin can that screws onto the engine. It’ll usually have oil filter written on it, together with other information, including a part code.
In some cases, the oil filter will unscrew by hand, but you may need to use an oil-filter removal tool – taking the form of either a chain or a metal strap – to securely grip the filter and unscrew it from its mounting. It’ll unscrew in an anticlockwise direction, and as it’s unscrewed waste oil may begin to drip from it. Its removal may also cause waste oil to flow from the sump at an increased rate, so ensure that your waste oil collecting vessel is positioned so it can collect oil from both locations.
Unscrew and remove the oil filter and pour the oil inside into your waste oil collecting vessel. The replacement oil filter can then be fitted – it’ll screw into position in the opposite direction to how the old one was unscrewed and removed. The oil filter may have a washer that fits between it and its mounting. Ensure the old washer is removed if there is one, fitting the new one in its place.
Using your finger, apply a thin coating of fresh oil to the oil filter’s thread and the filter’s seal. Screw the new oil filter in place by hand, as firmly as you can without using excessive force. You must take care to ensure the thread engaged, as crossing the thread could cause costly damage.
Your sump plug can now be re-installed. If you have a replacement, which is strongly recommended, remove the old washer from the sump plug and fit a replacement. Use a small amount of fresh oil to lubricate the thread before carefully screwing the sump plug into its hole, ensuring that it goes in squarely, engaging properly with its thread.
You’ll need to tighten the sump plug correctly according to the torque settings given by the manufacturer. While these are rarely listed in the owner’s manual, they can often be found on the internet or by asking a main-dealer workshop. It’s a good idea to have the correct workshop manual to hand, as it’ll contain this and other useful information for reference during your ownership of the car.
If the torque setting is 90NM, for example, set your torque wrench to that figure and gently tighten the sump-plug until the torque wrench clicks. The click indicates that the correct torque has been applied.
Remember, waste oil must be properly disposed of. Your local recycling centre will usually handle waste oil and may offer oil filter recycling. Under no circumstances should waste oil be poured down the drain – this causes considerable environmental harm and can lead to a substantial fine if you’re caught.
Refilling your engine oil
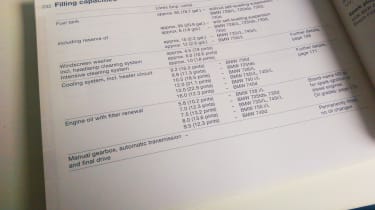
With the waste oil drained, a new oil filter installed and the sump plug correctly re-installed, you can now check how much oil to put in your car. Your owner’s manual will list the correct quantity of engine oil under its ‘fluids’ or ‘filling capacities’ section. When refilling your oil from empty, you should always use a figure that states oil capacity including oil filter.
While some technicians use a measuring jug to ensure that the correct amount of oil is added, you can achieve the same result by buying oil in containers that make up to the approximate oil capacity of your engine. For example, if your engine holds 5.5 litres of oil, a 4.5-litre and a one-litre bottle will give the right amount of oil in total.
It’s important to never overfill the engine, though. The maximum level on the oil dipstick should never be exceeded; doing so can cause mechanical damage. That means it’s best to pour in a little oil and check the dipstick often.
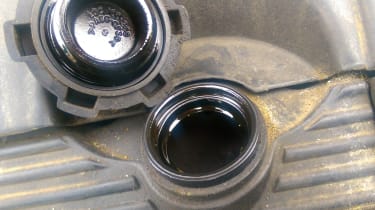
Your engine will have an oil filler cap – often marked with OIL (which can look like 710 upside down) or the same oil can that appears on the dipstick. Your owner’s manual will show you its location, usually towards the highest point of the engine. It’ll usually unscrew anti-clockwise.
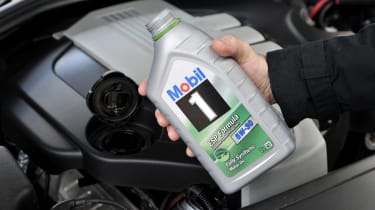
Your fresh engine oil can be poured into the hole once the oil filler cap has been removed. You should pour the oil in slowly to avoid spillage and air bubbles. Oil being poured at the correct speed should be silent as it leaves the bottle. Gulps of air leaving the container usually mean the oil is being poured too quickly.
Check the oil level using the same method described earlier in this feature. It could be that the oil level is not yet high enough to register on the dipstick. Keep adding oil and checking the dipstick until the oil level reaches the halfway point between MIN and MAX.
You may find there’s oil left over when the the correct level is reached. When the oil level reads as correct, re-fit the oil dipstick and the oil filler cap, check that the car is secure and out of gear and start the engine. Let it run for 30 seconds or so and then switch it off.
Check the oil level again. It’ll probably have dropped as the oil circulates through the engine and gathers in the oil filter. Add further oil until the correct level is reached on the dipstick.
With the oil level now correct, you have successfully changed the oil and oil filter in your car. Periodically check to ensure that there’s no leakage of oil from the sump plug or the oil filter, tightening as necessary.
Is an oil change the same as a service?
Although the replacement of the oil and oil filter are a vital part of a regular service, they’re far from all that’s involved. A full service at a garage may also include air filter, fuel filter and spark plug replacement. It could also include a number of checks and inspections, including tyre tread and brake pad thickness.
There are usually belts under the bonnet that can wear and need replacement, and if the car has a cambelt, this also needs replacement at a particular age or mileage.
Servicing a car doesn’t only include the engine. Bulbs may need replacing and adjustments may be required to items like handbrake cables. Depending on the service that your car is due, these items will either be included or chargeable if necessary.
If your garage mentions complicated-sounding components that you don't recognise, follow this link to our car mechanic jargon-buster.
What kind of oil does my car need?
Your owner’s manual will specify the correct viscosity for the oil in your car, given as an SAE value. Common types are named SAE10W40, 5W30 or 0W30.
As the next section outlines, there are other factors to consider when selecting an engine oil.
Is expensive oil better than cheap oil?
Expensive oil isn’t always better than cheap oil and a recognised brand name doesn’t necessarily tell the whole story. While you have no way to determine the quality of oil inside a package on a shelf at a motor factors, you can at least determine its specification and suitability for a car.
Car manufacturers often issue a specification that ensures suitability for the car and will be listed in the owner’s manual.
There are other variations, too. Certain oils are formulated to offer better protection for older engines or for newer or higher-revving engines, and other oils are designed specifically for diesel cars. There are also mineral and synthetic oils and those that are mixtures of the two.
Your supplier will be happy to make a recommendation, but paying more doesn’t necessarily mean that the oil will be better for your engine.
Car care made simple
Recommended

MoT guide: cost, info and what happens if your car fails
Most Popular
Tips & advice

Car dashboard warning lights: what does each symbol mean?

Electric car charging stations: public networks, charger types, apps and maps


